


Cafetieres - How to Use the Simplest Coffee Brewer

Cafetieres (also known as a french press) were patented in 1852 by Frenchmen Jacques-Victor Delforge and Henri-Otto Mayer. The original design was fully metal and used some form of metal or cheesecloth screen that was fitted to a rod. Not much has changed in the design, though most modern Cafetieres are made of glass or have some sort of viewpoint that shows you the coffee brewing process.
Cafetieres - How Much Coffee to Use
Getting the right measure for how much coffee to use can be tricky, here’s a quick guide for how much coffee to use, depending both on the size of the cafetiere, and how many cups of coffee you are wanting to make. The general rule of thumb is one tablespoon per cup of coffee.
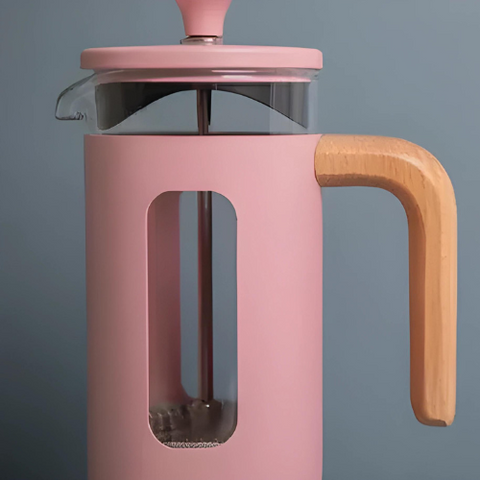
Pisa Cafetiere Pink - 3 Cup - £26.50
3 Cup Cafetiere
Use three tablespoons of ground coffee for three cups of coffee. You can always add a little bit more or less, or brew the coffee for a shorter or longer time if you’d like the strength to be a little bit different. You would also use roughly 125ml of water per tablespoon for each cup of coffee you want to make.
4 Cup Cafetiere
For 4 Cups, you would use four tablespoons of ground coffee and once again adjust the amount and brewing time for your desired strength.
6 Cup Cafetiere
For a 6 cup Cafetiere you could use six tablespoons of ground coffee, but of course you don’t have to use this much if you are making coffee for less people.
8 Cup Cafetiere
Once again this is the same as the above - 8 tablespoons of coffee if you want to make eight cups of coffee, but you don’t have to and just adjust to 1 tablespoon of ground coffee per cup you are wanting to make.
Making Cafetiere Coffee for One
This is nice and easy, get your cafetiere of choice (any size is fine!) and add one tablespoon of Coffee (adjust to your preferred strength), and then add roughly 125ml of hot water.
What Coffee to Use
With so many different variations in coffee types, coffee grind sizes and everything else, it can be quite a task deciding what coffee to use in your cafetiere. Fret not, we’ve got you covered.
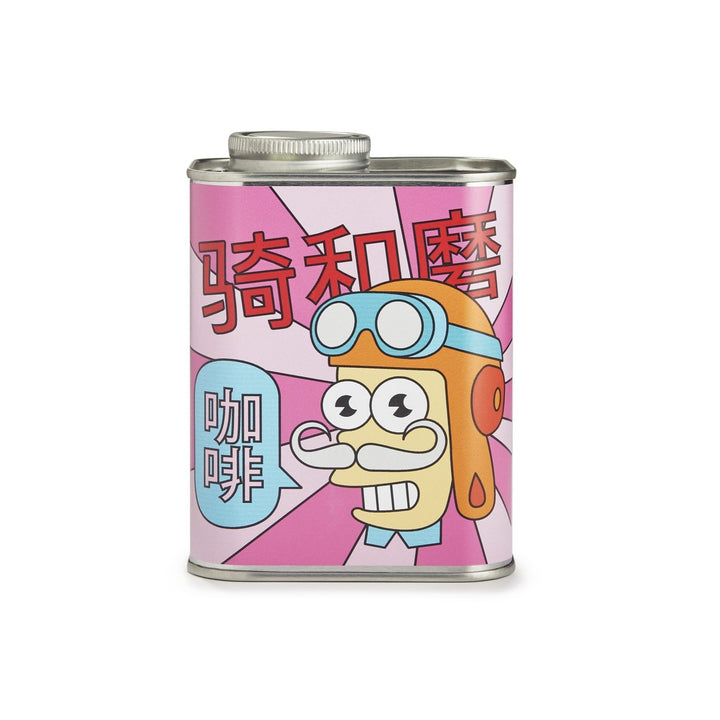
Ride & Grind Mr Driver Coffee Beans - £15
(Would need to be ground for use in a cafetiere)
Types of Coffee
When using a cafetiere, using Coarsely ground coffee is ideal. This prevents coffee grounds leaking into your pour, and allows the coffee to extract fully. Fully immersing the coffee is also better than immersing it in water allowing for a better type of coffee.
For coffee roast types it’s really up to your own preference. A lot of coffee drinkers prefer a darker roast as this allows for the flavours to really shine, but if that’s not really your style you can just choose your favourite blend.
Coffee Beans in a Cafetiere
Unfortunately you cannot use coffee beans alone in a cafetiere and the process does require ground coffee to be used. If you have ungrounded beans, you can use a manual coffee grinder to get a little workout and the perfect grind for a tasty cup of joe. If you don’t have a manual coffee grinder or plans to get one, you can use a food blender to do the job for you - be careful not to grind your coffee too fine.
Best ways to Use
You can be quite versatile when choosing how to use a cafetiere - with options to use the cafetiere for normal coffee, iced coffee, frothing milk and even as an impromptu teapot.
Making Perfect Cafetiere Coffee
- Boil your water - roughly 125ml per cup of coffee you are wanting to make.
- Measure coffee - 1 tablespoon Per 125ml of water
- Preheat the Cafetiere - Pour a small amount of hot water in, swirl the water around and then empty out.
- Add coffee - Add the coffee grounds to the cafetiere.
- Pour hot water - Pour water over the coffee grounds using a circular motion to ensure all the grounds are saturated. Stir the mixture ensuring all the coffee is fully immersed in water.
- Put on the lid - After putting on the lid, let the coffee steep for roughly 4 minutes - adjusting the time for your preferences.
- Take the plunge - Once fully steeped, press down the plunger softly using steady and even pressure to separate the grounds from the water.
- Pour and Enjoy - Pour the freshly brewed coffee into your mug
- Customise - Customise your coffee to your preference with milk (we like oat milk with our coffee!) or sugar.
Iced Coffee
- Make coffee with the previous steps
- Pour the freshly made coffee into a new container
- Allow the coffee to cool down to room temperature
- Put the coffee into the fridge until chilled
- Add a generous amount of ice to your glass and then add your chilled coffee
- Customise it to your own tastes with milk, sugar or syrups.

Cafe Pocco Barista Coffee Syrup Set - £12.00
Milk Frothing
You can do it all with a cafetiere! Make a strong coffee with your cafetiere, whilst it is infusing you can heat up some milk in a pot - ensure it is not boiling so you don’t injure yourself in the next step. Clean out your cafetiere and then pour the warm (not boiling) milk into it. Drive the plunger slowly and safely up and down to froth the milk yourself. Once frothed, pour it into your coffee mug with your freshly made coffee for a fancy homemade cup of joe.
If you'd like to browse our full collection of coffee & tea click here. We have a selection of coffee gadgets, cups and whatever else.
If you liked this blog, you may be interested in reading our guide on how to use a moka pot!
Enjoy the coffee's my Quince & Cookies! xox